Crafting a Solid Foundation: A Guide on How to Build a Shower Pan on a Plywood Floor
Introduction
Building a shower pan on a plywood floor requires careful planning and precise execution to ensure a watertight and durable foundation. Whether you’re embarking on a bathroom renovation or constructing a new shower, this comprehensive guide will walk you through the steps of creating a shower pan on a plywood surface. From materials and tools to the step-by-step process, we’ve got you covered.
Table of Contents
- Understanding the Basics of Shower Pan Construction
- Materials and Tools You’ll Need
- Preparing the Plywood Subfloor
- Creating the Slope for Proper Drainage
- Installing the Shower Liner
- Framing the Curb
- Applying the Mortar Bed
- Laying the Shower Pan Tiles
- Grouting and Sealing
- Installing the Drain
- Common Mistakes to Avoid
- Frequently Asked Questions (FAQs)
- Conclusion
1. Understanding the Basics of Shower Pan Construction
A shower pan is a crucial component of any shower, serving as the waterproof barrier that directs water to the drain. Building a shower pan on a plywood floor involves creating a slope for proper drainage, installing a waterproof liner, and finishing with a tiled surface.
2. Materials and Tools You’ll Need
Gather the following materials and tools before starting the project:
Materials:
- Plywood sheets
- Waterproofing membrane or shower pan liner
- Mortar mix
- Cement backer board
- Mesh tape
- Thin-set mortar
- Shower pan drain assembly
- Shower pan liner adhesive
- Tile and grout
- Sealer
Tools:
- Circular saw
- Level
- Trowel
- Notched trowel
- Rubber float
- Utility knife
- Drill with mixing paddle
- Measuring tape
- Rubber gloves
3. Preparing the Plywood Subfloor
Ensure your plywood subfloor is structurally sound and level. Replace any damaged or uneven sections. Apply a layer of thin-set mortar to the plywood to create a strong bond with the shower pan liner.
4. Creating the Slope for Proper Drainage
Use a level to determine the desired slope toward the drain. Typically, a quarter-inch slope per foot is recommended. Mark and cut the plywood accordingly to create the slope, ensuring water flows toward the drain.
5. Installing the Shower Liner
5.1 Positioning the Liner
Unroll the shower pan liner and position it over the plywood, allowing it to extend up the walls by a few inches. Ensure the liner covers the entire shower floor and curb area.
5.2 Attaching the Liner
Secure the shower pan liner in place using staples or adhesive. Pay special attention to corners and seams, ensuring a watertight seal. Trim any excess liner, leaving a slight overhang to be folded over the curb.
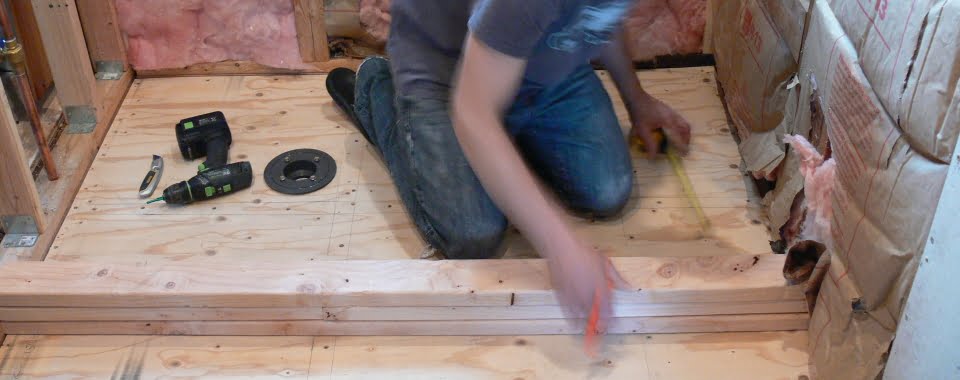
6. Framing the Curb
Build a curb using two-by-fours or cement board. Secure the boards to the plywood floor, ensuring they are level and provide a smooth transition from the shower pan to the bathroom floor.
7. Applying the Mortar Bed
Mix the mortar according to the manufacturer’s instructions. Apply a layer of mortar over the shower pan liner, sloping it toward the drain. Use a trowel to achieve a smooth and even surface.
8. Laying the Shower Pan Tiles
8.1 Preparing the Surface
Once the mortar bed has cured, apply a layer of thin-set mortar to the surface using a notched trowel. This prepares the surface for tile installation.
8.2 Placing the Tiles
Lay the shower pan tiles in the desired pattern, starting from the center and working outward. Use tile spacers to maintain consistent gaps between the tiles.
8.3 Cutting Tiles
Use a tile cutter or wet saw to cut tiles as needed, especially around the drain and along the edges. Ensure a precise fit for a professional-looking finish.
9. Grouting and Sealing
9.1 Grouting
After the thin-set mortar has cured, apply grout between the tiles using a rubber float. Work the grout into the joints and wipe away excess with a damp sponge. Allow the grout to set.
9.2 Sealing
Once the grout has dried, apply a penetrating sealer to protect the tiles and grout from moisture. Follow the manufacturer’s instructions for the specific sealer you choose.
10. Installing the Drain
10.1 Assembling the Drain
Install the shower pan drain assembly according to the manufacturer’s instructions. Ensure a watertight seal by using plumber’s putty or silicone around the drain flange.
10.2 Connecting the Drain to the Plumbing
Connect the drainpipe to the plumbing, ensuring a secure and leak-free connection. Test the drain by pouring water into the shower pan and checking for any signs of leakage.
11. Common Mistakes to Avoid
11.1 Inadequate Slope
Ensure the proper slope is achieved to allow water to flow toward the drain efficiently. Inadequate slope can result in standing water in the shower.
11.2 Insufficient Waterproofing
Thoroughly waterproof the shower pan to prevent leaks. Pay close attention to corners, seams, and the junction between the shower pan liner and the drain.
12. Frequently Asked Questions (FAQs)
1: Can I build a shower pan on any plywood subfloor?
While plywood is commonly used, it’s crucial to ensure the subfloor is structurally sound, level, and suitable for wet conditions. Consider using exterior-grade plywood.
2: Do I need a special type of mortar for the shower pan?
Use a mortar mix specifically designed for wet areas. This type of mortar provides a strong bond and durability suitable for a shower pan.
3: Can I install a shower pan liner without professional help?
Installing a shower pan liner is a manageable DIY task, but attention to detail is essential. Ensure proper attachment, sealing, and overlap for effective waterproofing.
4: What size tiles are suitable for a shower pan?
Smaller tiles, such as mosaic or subway tiles, are commonly used for shower pans due to their ability to conform to the slope and shape of the pan.
5: How long should I wait before applying grout?
Allow the thin-set mortar to cure completely before grouting. This typically takes 24 to 48 hours, but follow the manufacturer’s recommendations.
6: Can I install a pre-made shower pan on a plywood floor?
Pre-made shower pans are designed for specific applications and may not be suitable for a plywood floor. Follow the manufacturer’s guidelines for compatibility.
7: Should I seal the shower pan tiles?
Yes, it’s recommended to seal the tiles and grout in the shower pan to protect against water damage and mold growth.
8: Can I install a linear drain in a plywood shower pan?
Yes, linear drains can be installed in plywood shower pans. Ensure proper slope and waterproofing around the drain area.
9: How do I ensure a watertight seal around the shower curb?
Apply waterproofing membrane or shower pan liner over the curb, ensuring it extends onto the shower pan and bathroom floor. Seal corners and seams thoroughly.
10: Can I install a glass shower door on a plywood shower pan?
Yes, you can install a glass shower door on a plywood shower pan. Ensure the shower pan is properly waterproofed, and follow the door manufacturer’s instructions for installation.
13. Conclusion
Building a shower pan on a plywood floor is a rewarding DIY project that can enhance the functionality and aesthetics of your bathroom. By following the steps outlined in this guide and paying attention to crucial details, you can create a durable and watertight foundation for your shower. Whether you’re a seasoned DIY enthusiast or tackling this project for the first time, the key is meticulous planning and execution. With a properly built shower pan, you can enjoy a reliable and stylish shower space for years to come.